

I’m always working on new projects in my home, but I’m also trying to play catch-up on posting about my older projects LOL! Here’s one that I did a few years back when DIY Faux Capiz Shell chandeliers started popping up on the internet.
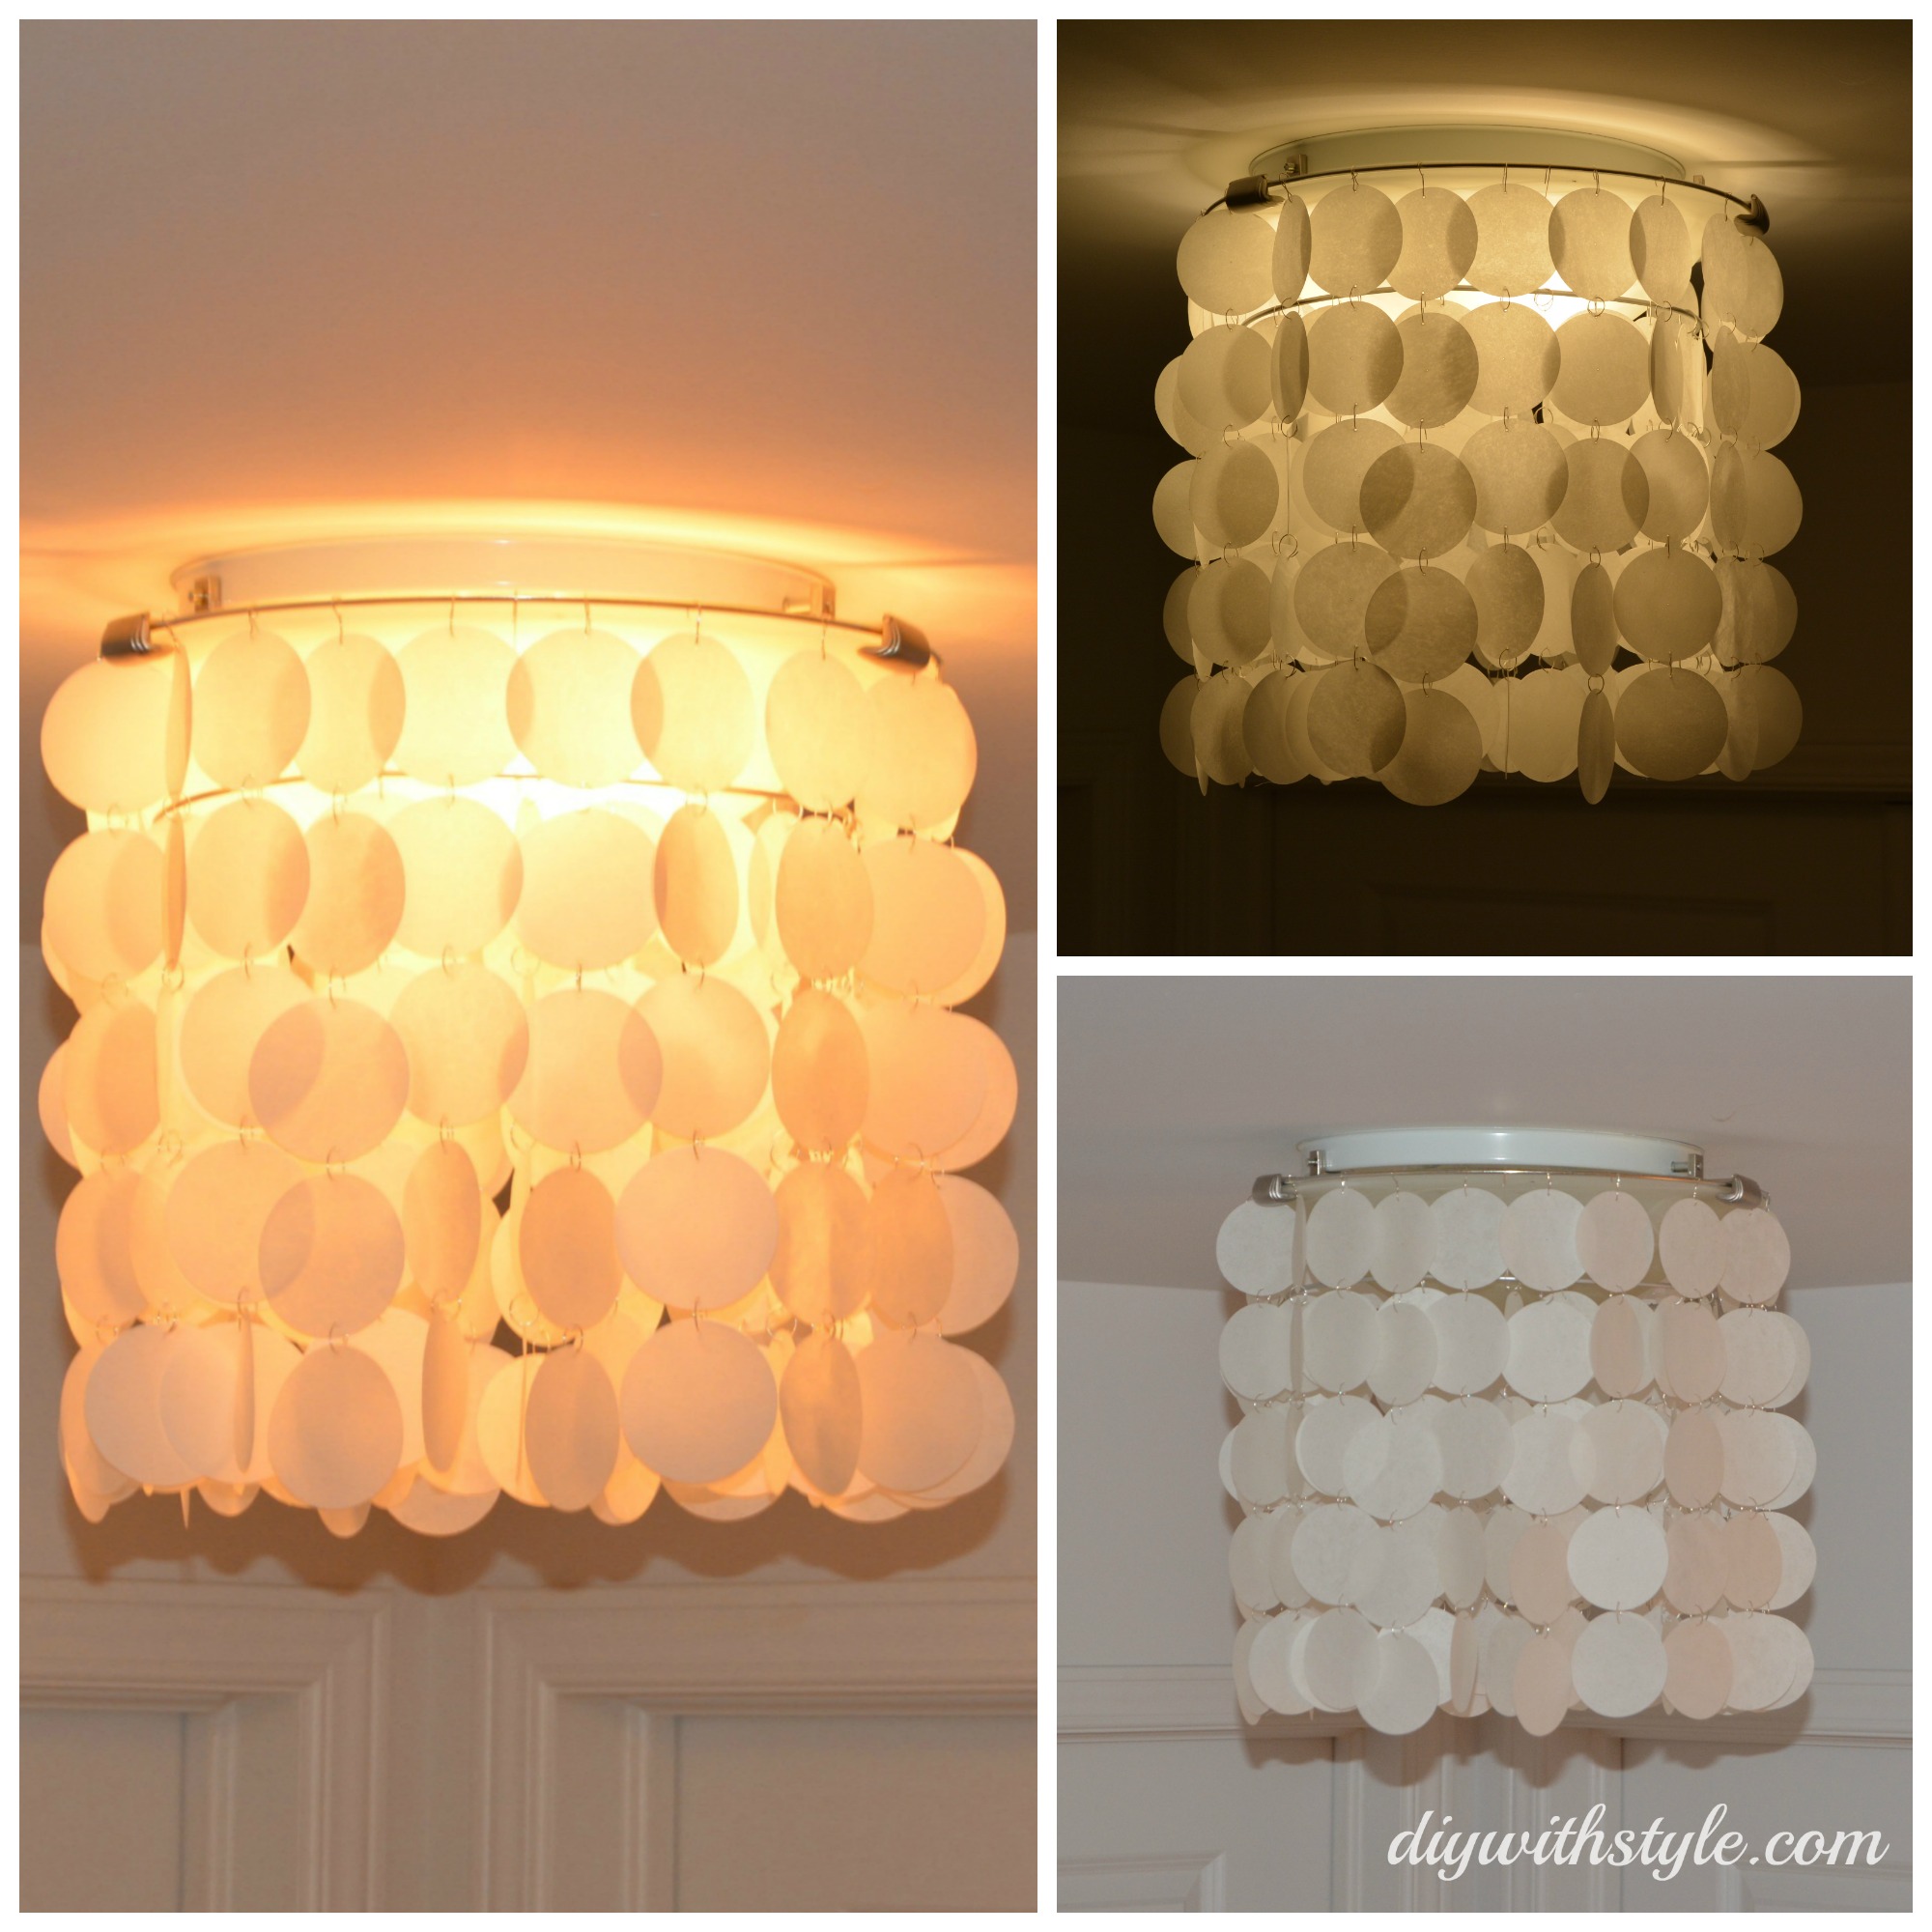
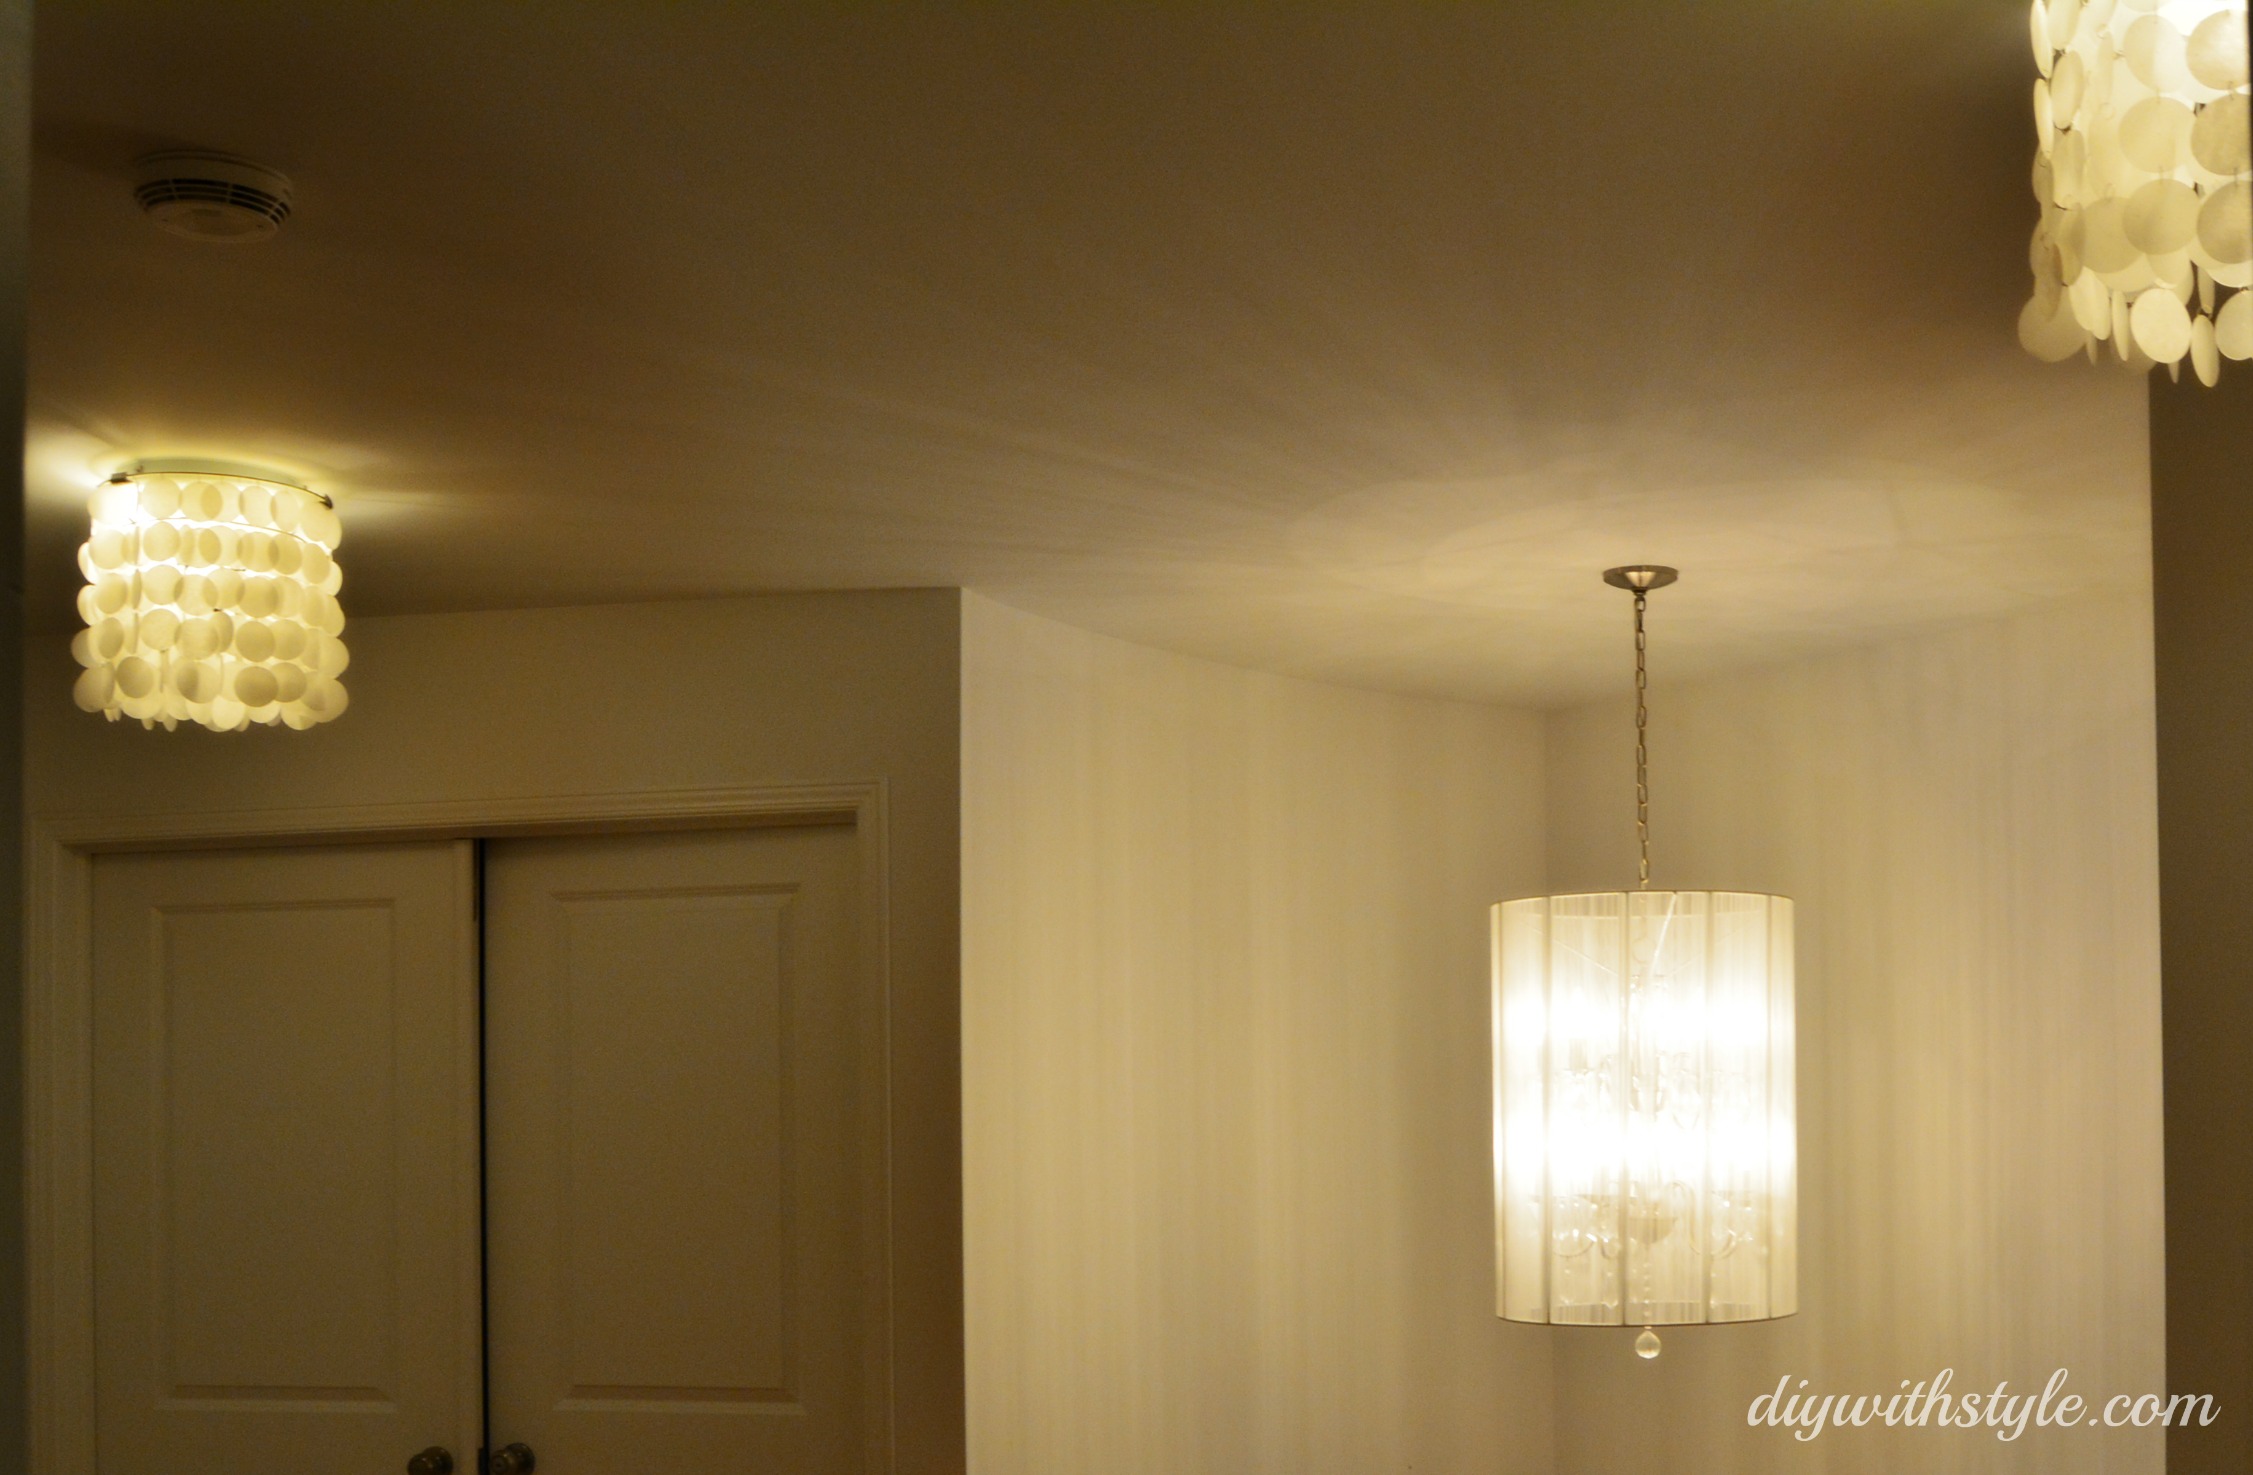
We have a beautiful large chandelier lighting the upstairs hallway, hanging just above the winding staircase. In that same hallway, we also had two ceiling flushmounts, or “boob” lamps (as Tommy Smythe so affectionately calls them!) installed, temporarily just after our move into the house. We were looking to replace these. Whatever other light was going to hang in that hallway had to complement that large chandelier, but not distract attention away from it. I wanted something simple, flowy, but not busy. So I was picturing something white but not completely opaque . I thought of a capiz shell chandelier but I didn’t want anything shiny or off white/coloured (see where I was going with this?). And that’s when i stumbled upon this post right here and thought “Yes! Faux Capiz Pleaz!” The colour, opacity, flowyness, business… everything about this was what I was imagining.
I actually chose to keep the “boob” lamps in place (including the glass dome covers) and build the capiz chandelier around it because:
- the glass cover prevents the heat from the light bulbs from damaging the wax shells
- the glass cover actually softens the light
- the clips/glass cover contraption actually made it easy for me to attach a metal frame onto which the chandelier could hang (seen further down)
So if you’d like to see how i made these, keep reading!
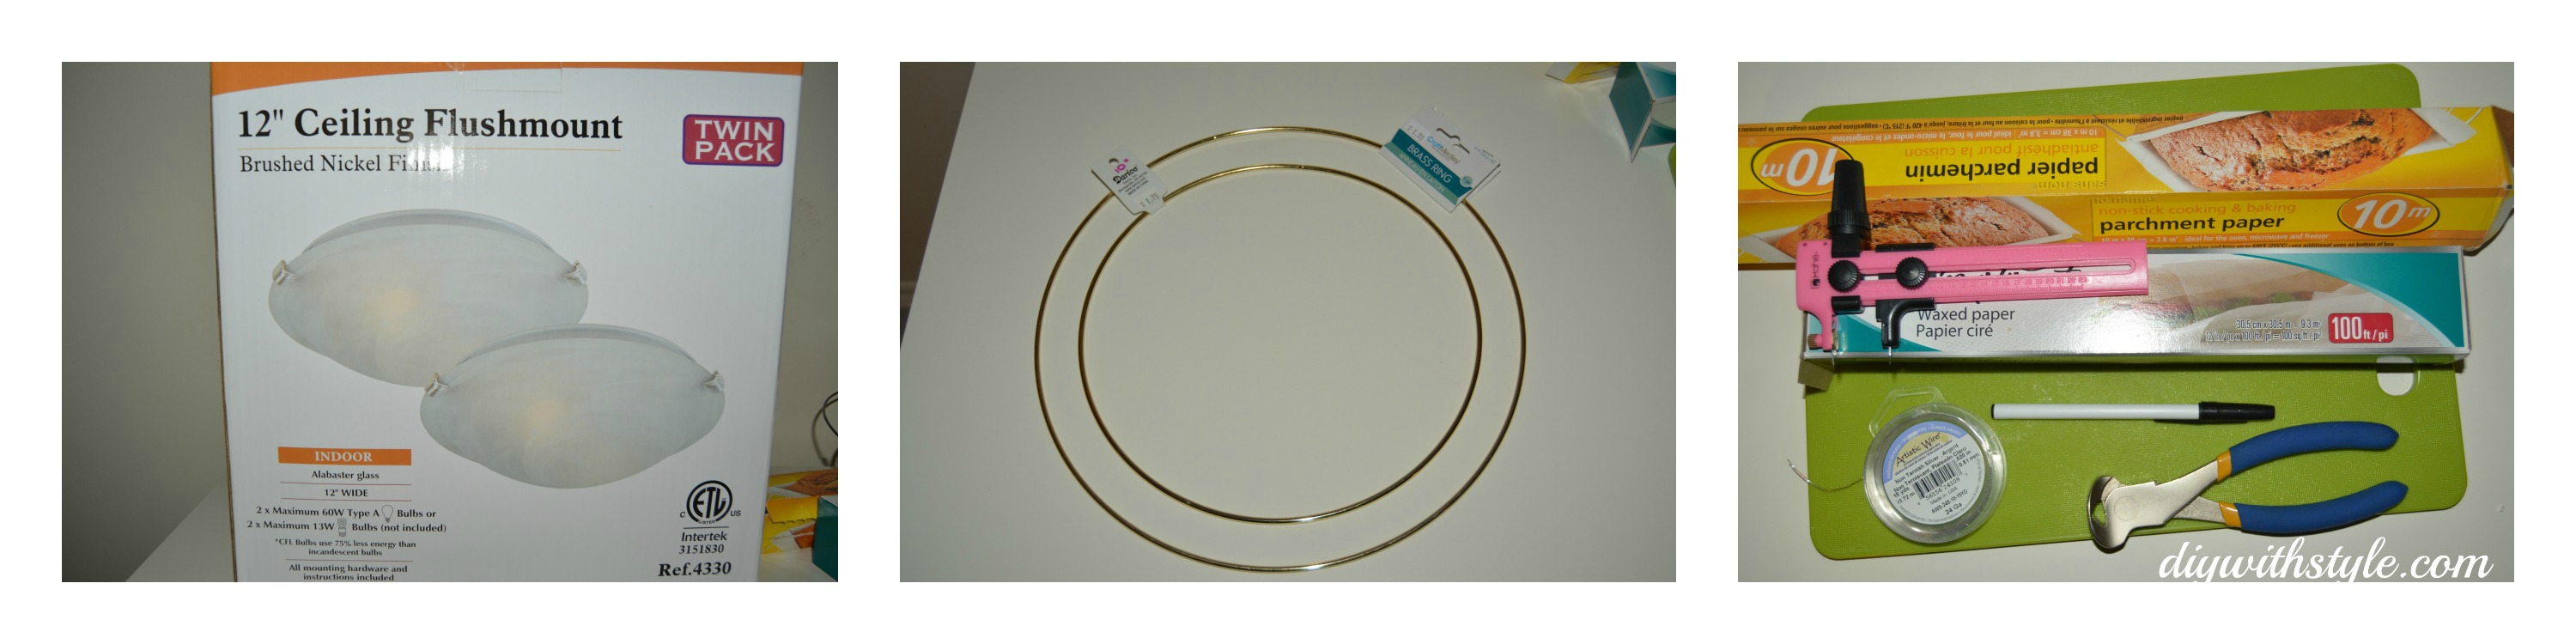
Supplies
- Round flushmount ceiling light
- 2-3 metal rings of varying sizes (I purchased mine from a local hobby store). The largest ring should be the same diameter as the ceiling light (I used 12” for the flushmount and large brass ring diameter. The diameter of the smaller ring was 10”)
- Spray paint (white or silver) optional, if you chose to paint the metal rings
- Thin metal wire – the kind used for crafting/jewelery making is best
- Wire cutters (or really good scissors)
- A pen
- A roll of good quality wax paper
- Two large sheets of parchment paper
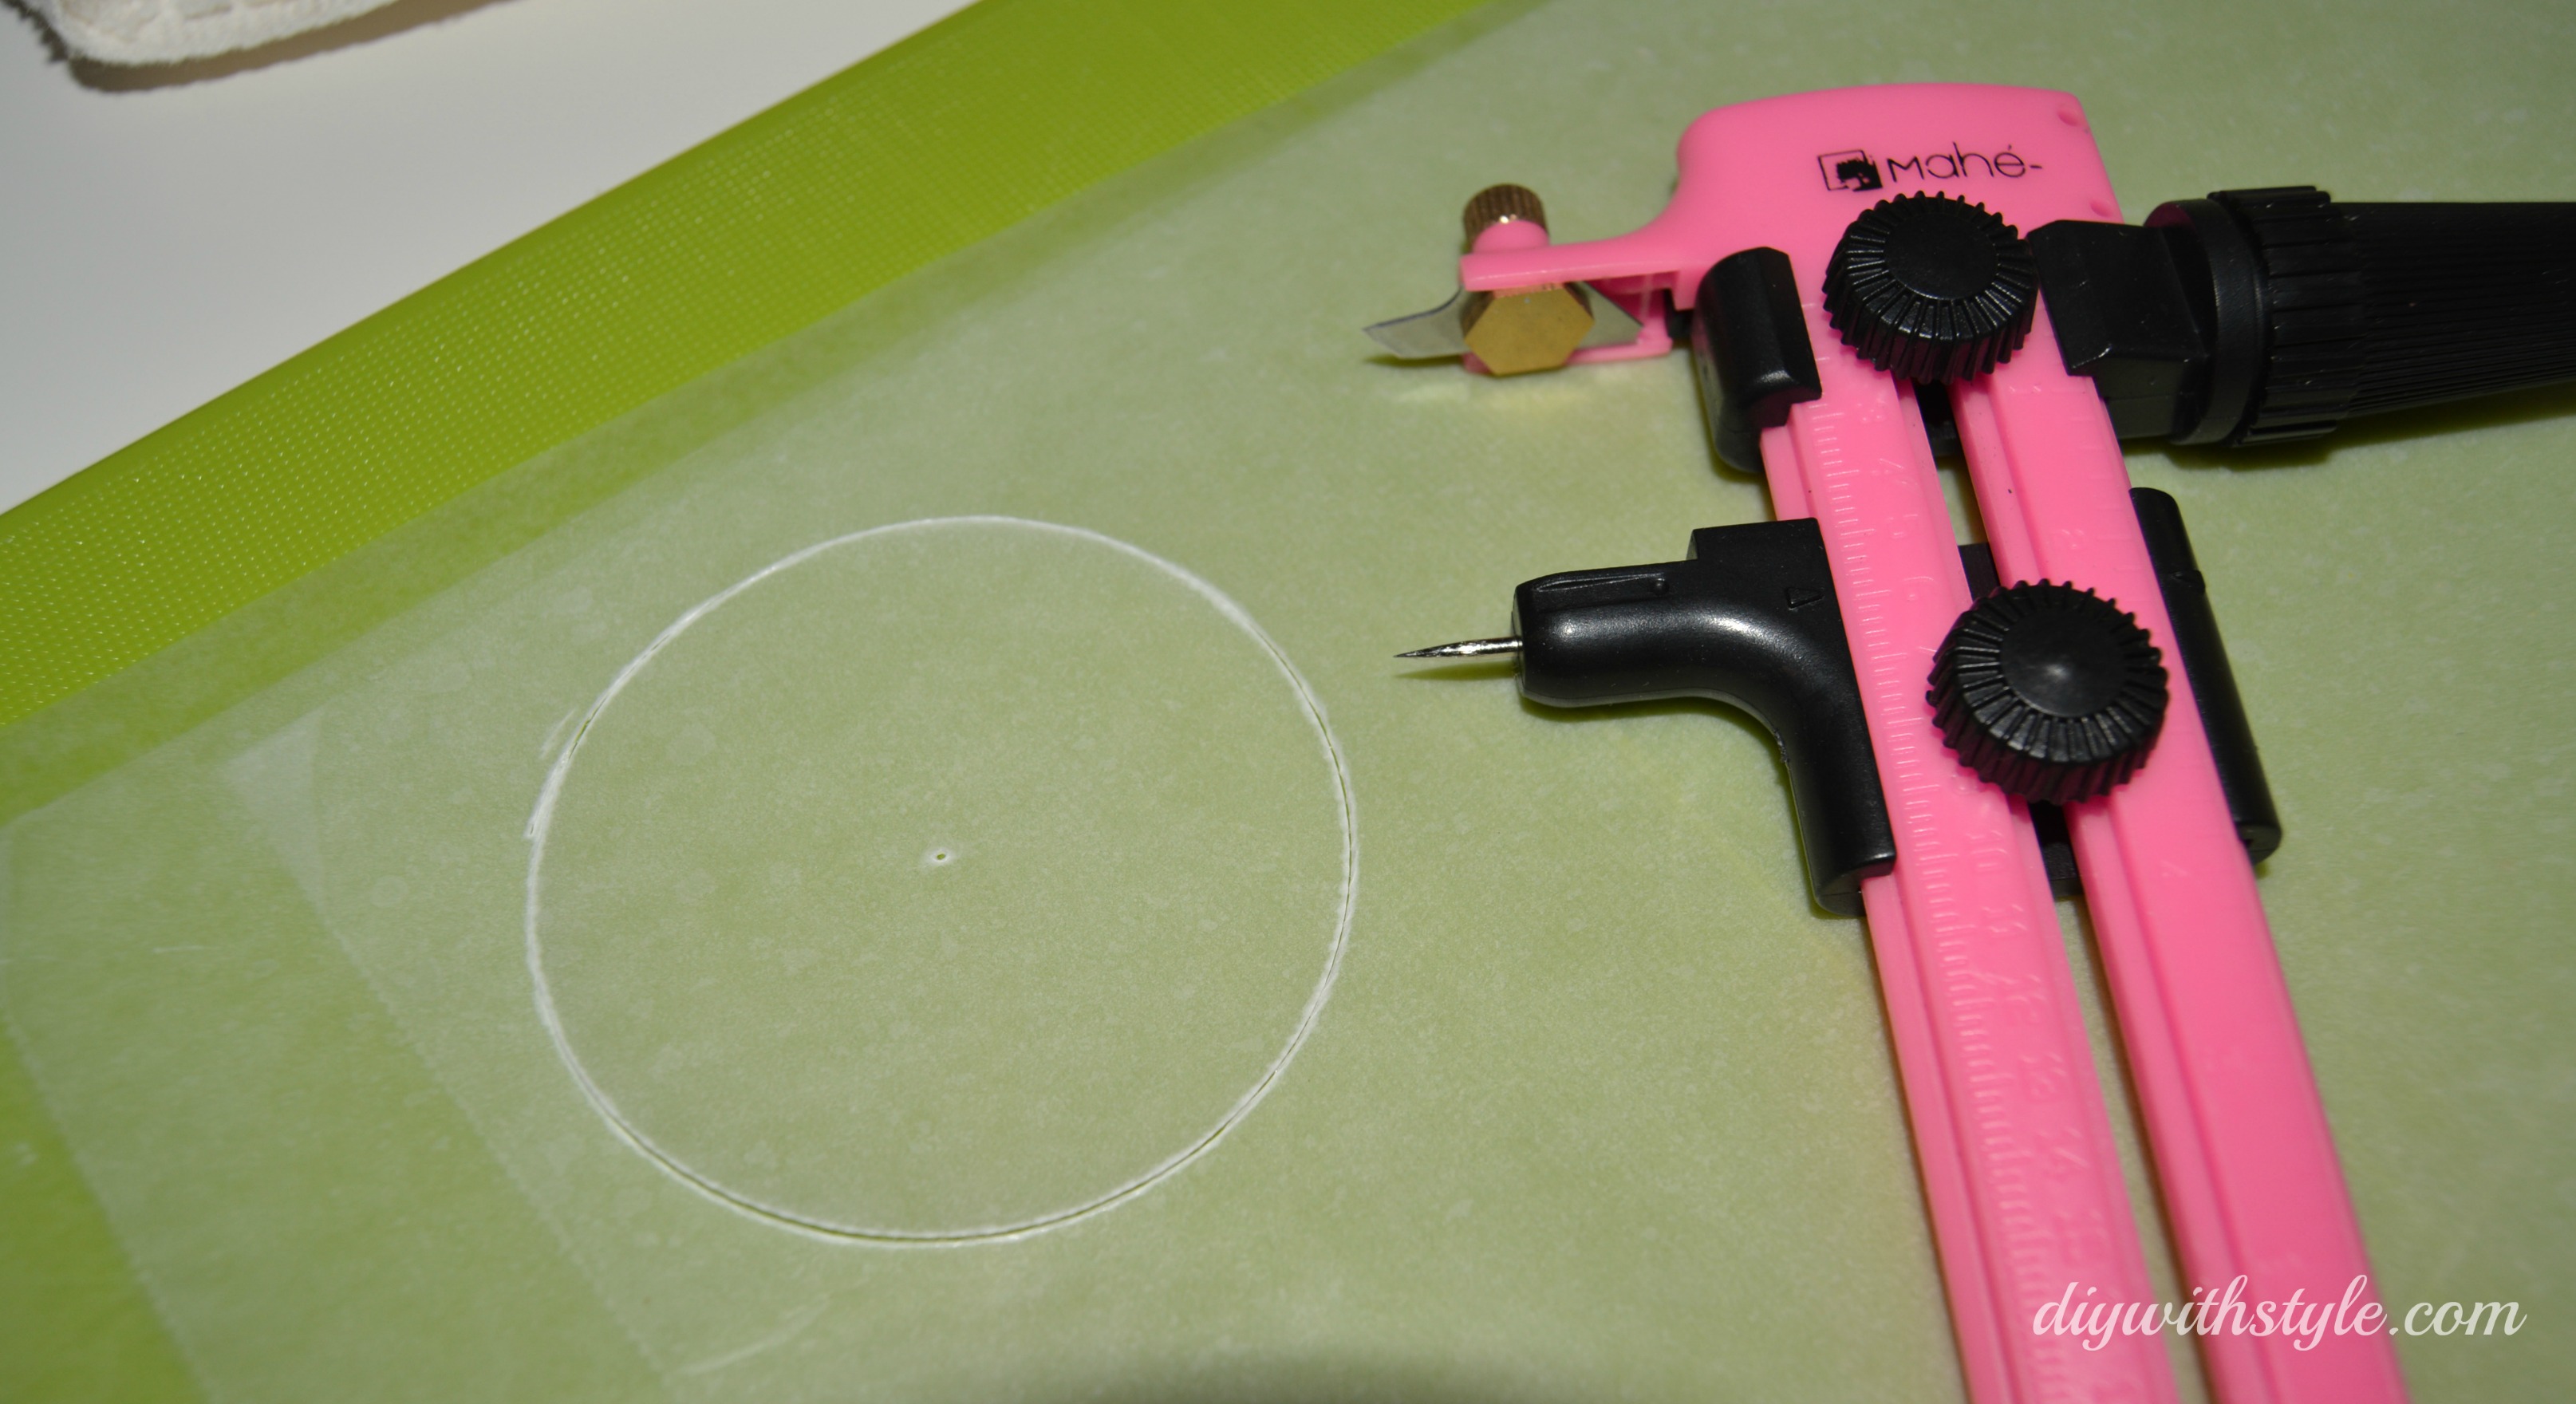
- A circle cutter (a cutting protractor or a 2-2.5” punch)
- A cutting board if using a protractor-type circle cutter
- An iron & safe ironing surface (board, towels on floor etc)
Steps
1. Spray paint the metal rings which you will use for the frame, and let dry.
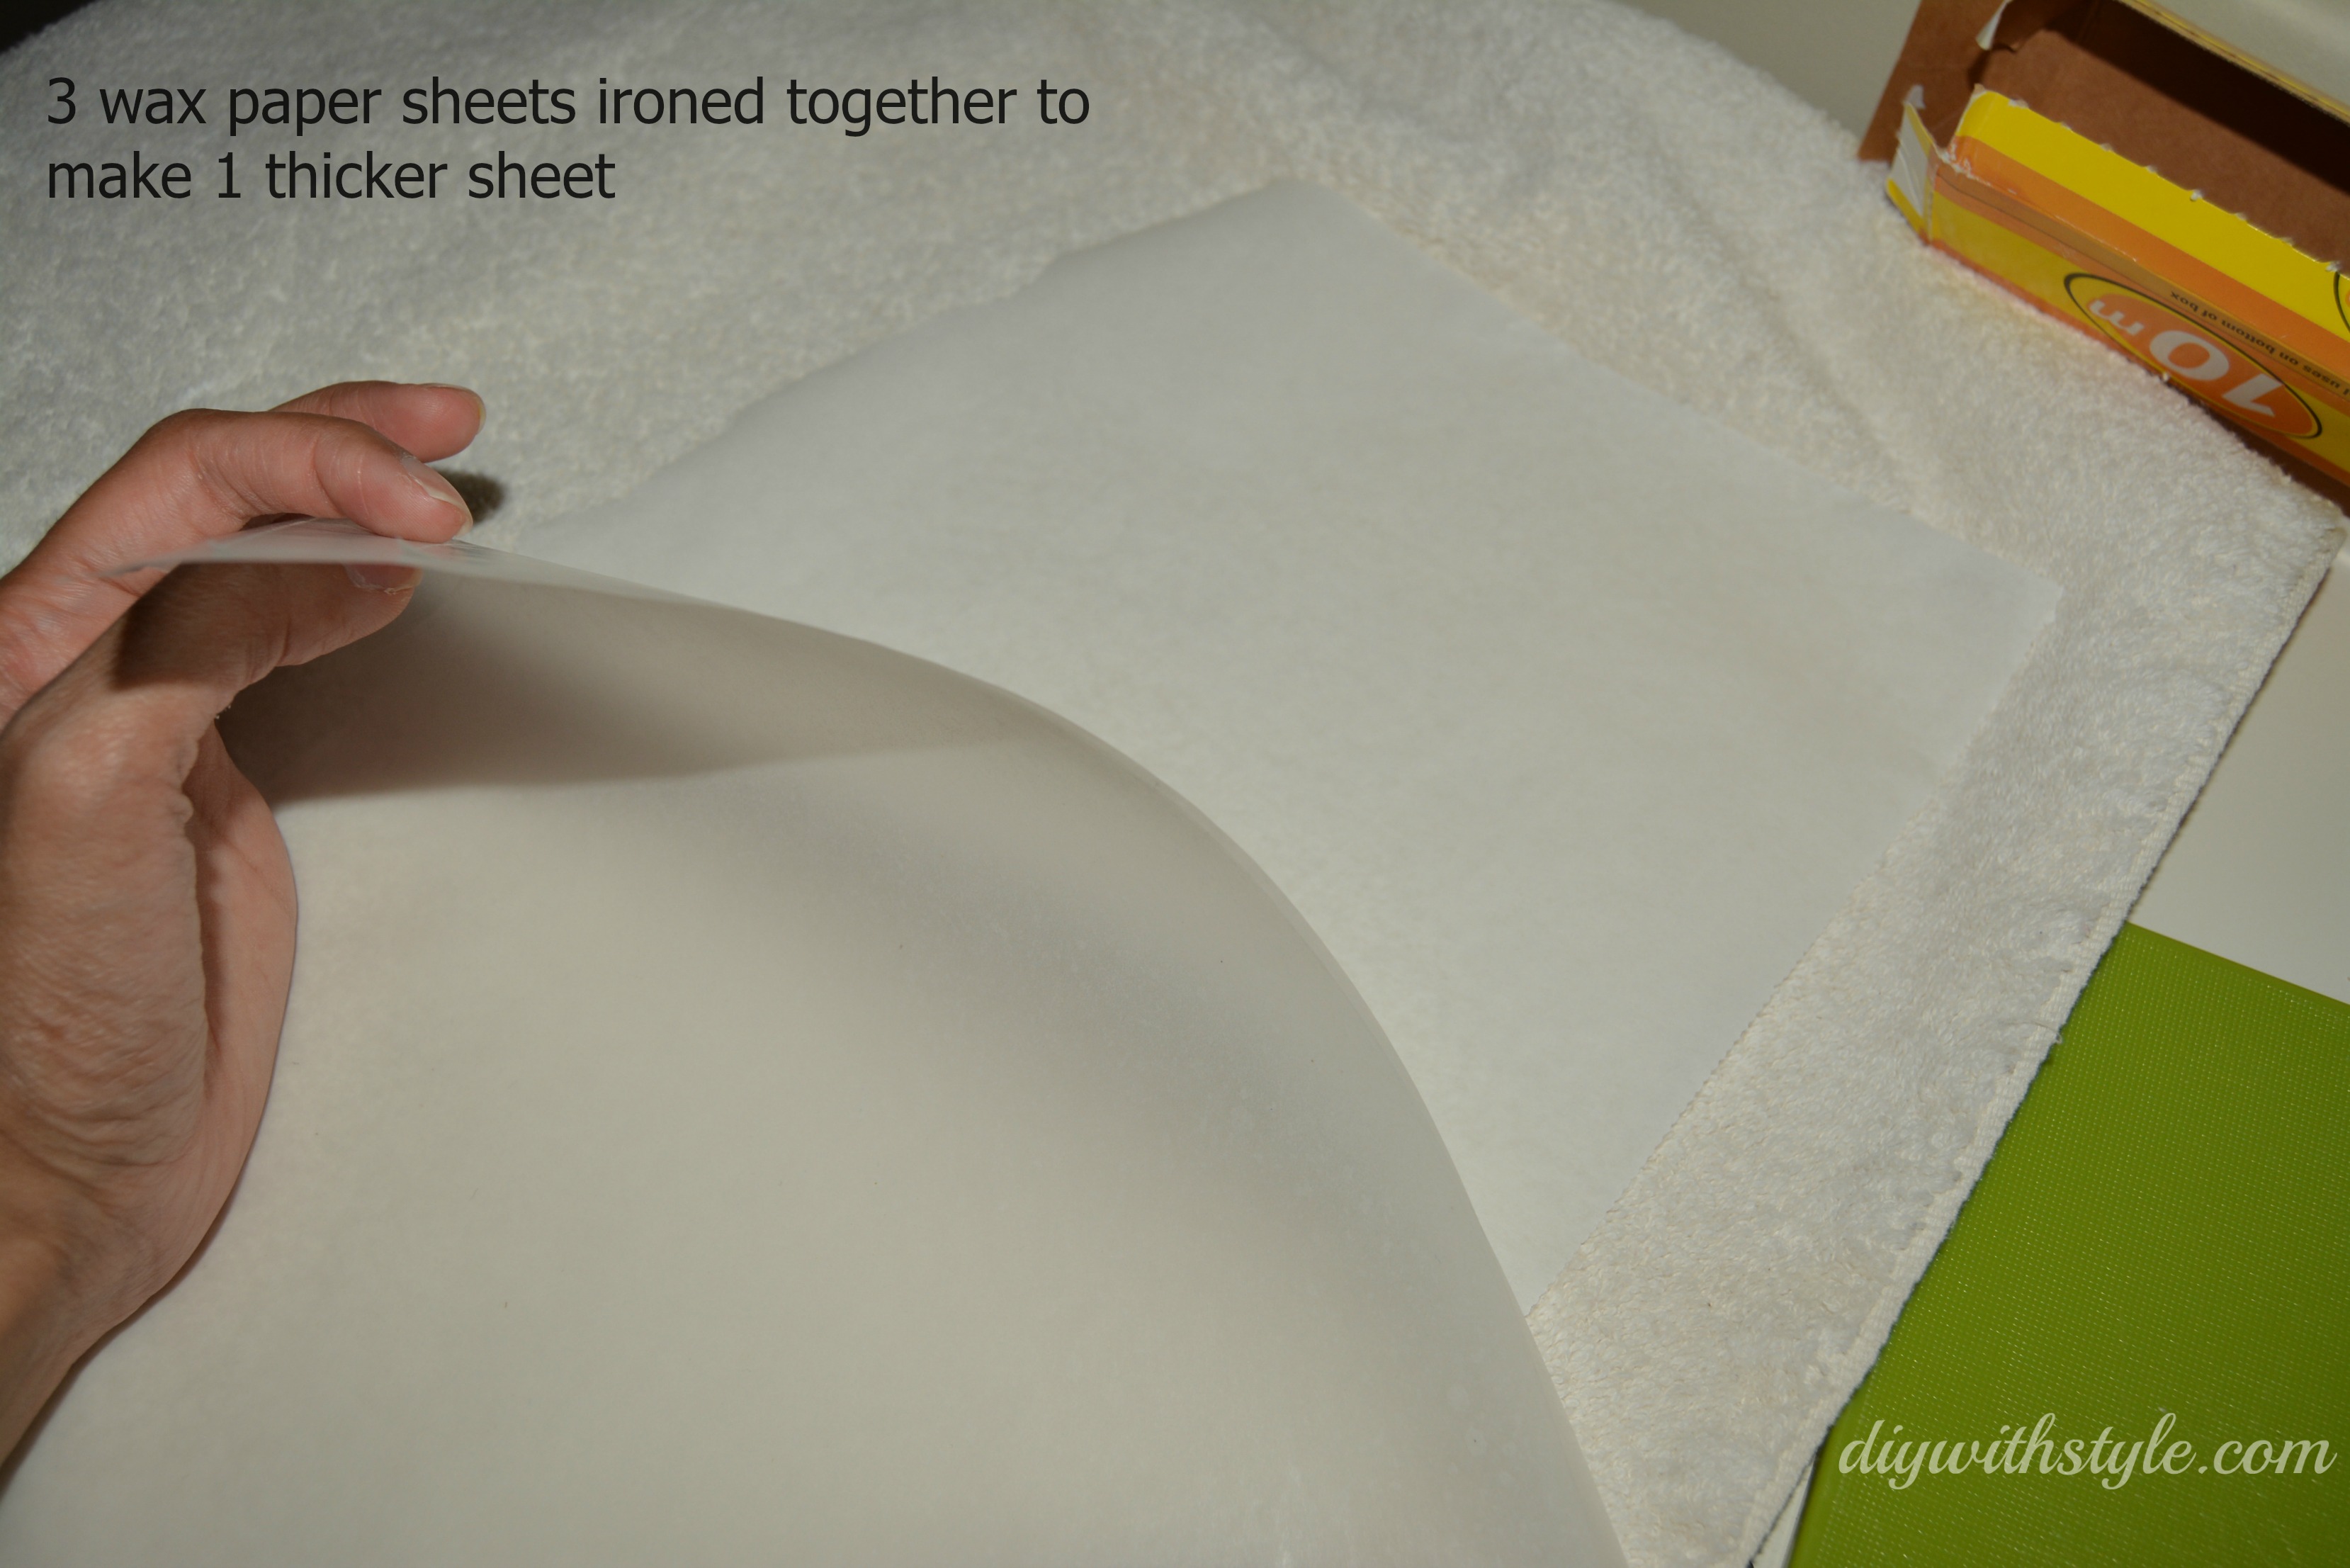
2. To make the wax “capiz” shells, layer three pieces of wax paper of the same length, and place them between the two sheets of parchment paper (the parchment paper should cover the wax paper completely).
3. Lay the sandwich on your flat ironing surface and iron at a low setting to melt the wax sheets together to make a thicker wax paper sheet.
4. Remove the parchment paper and repeat, then repeat again, and again and again…. until you’ve gotten enough thick wax paper sheets to cut out all those pretty circles.
5. Cut out your wax paper circles using a circle cutter (on a cutting board if you’re using a protractor with blade), 2-2.5″ in diameter.
6. To make the wire hoops that will be the links between each capiz shell: simply wind the crafting/jewellery wire around a pen. Pull the pen out so you’re left with what looks like a spring. Take wire cutters and cut right through the length of the spring so you’re left with hoops. Repeat until you have the number of hoops desired.

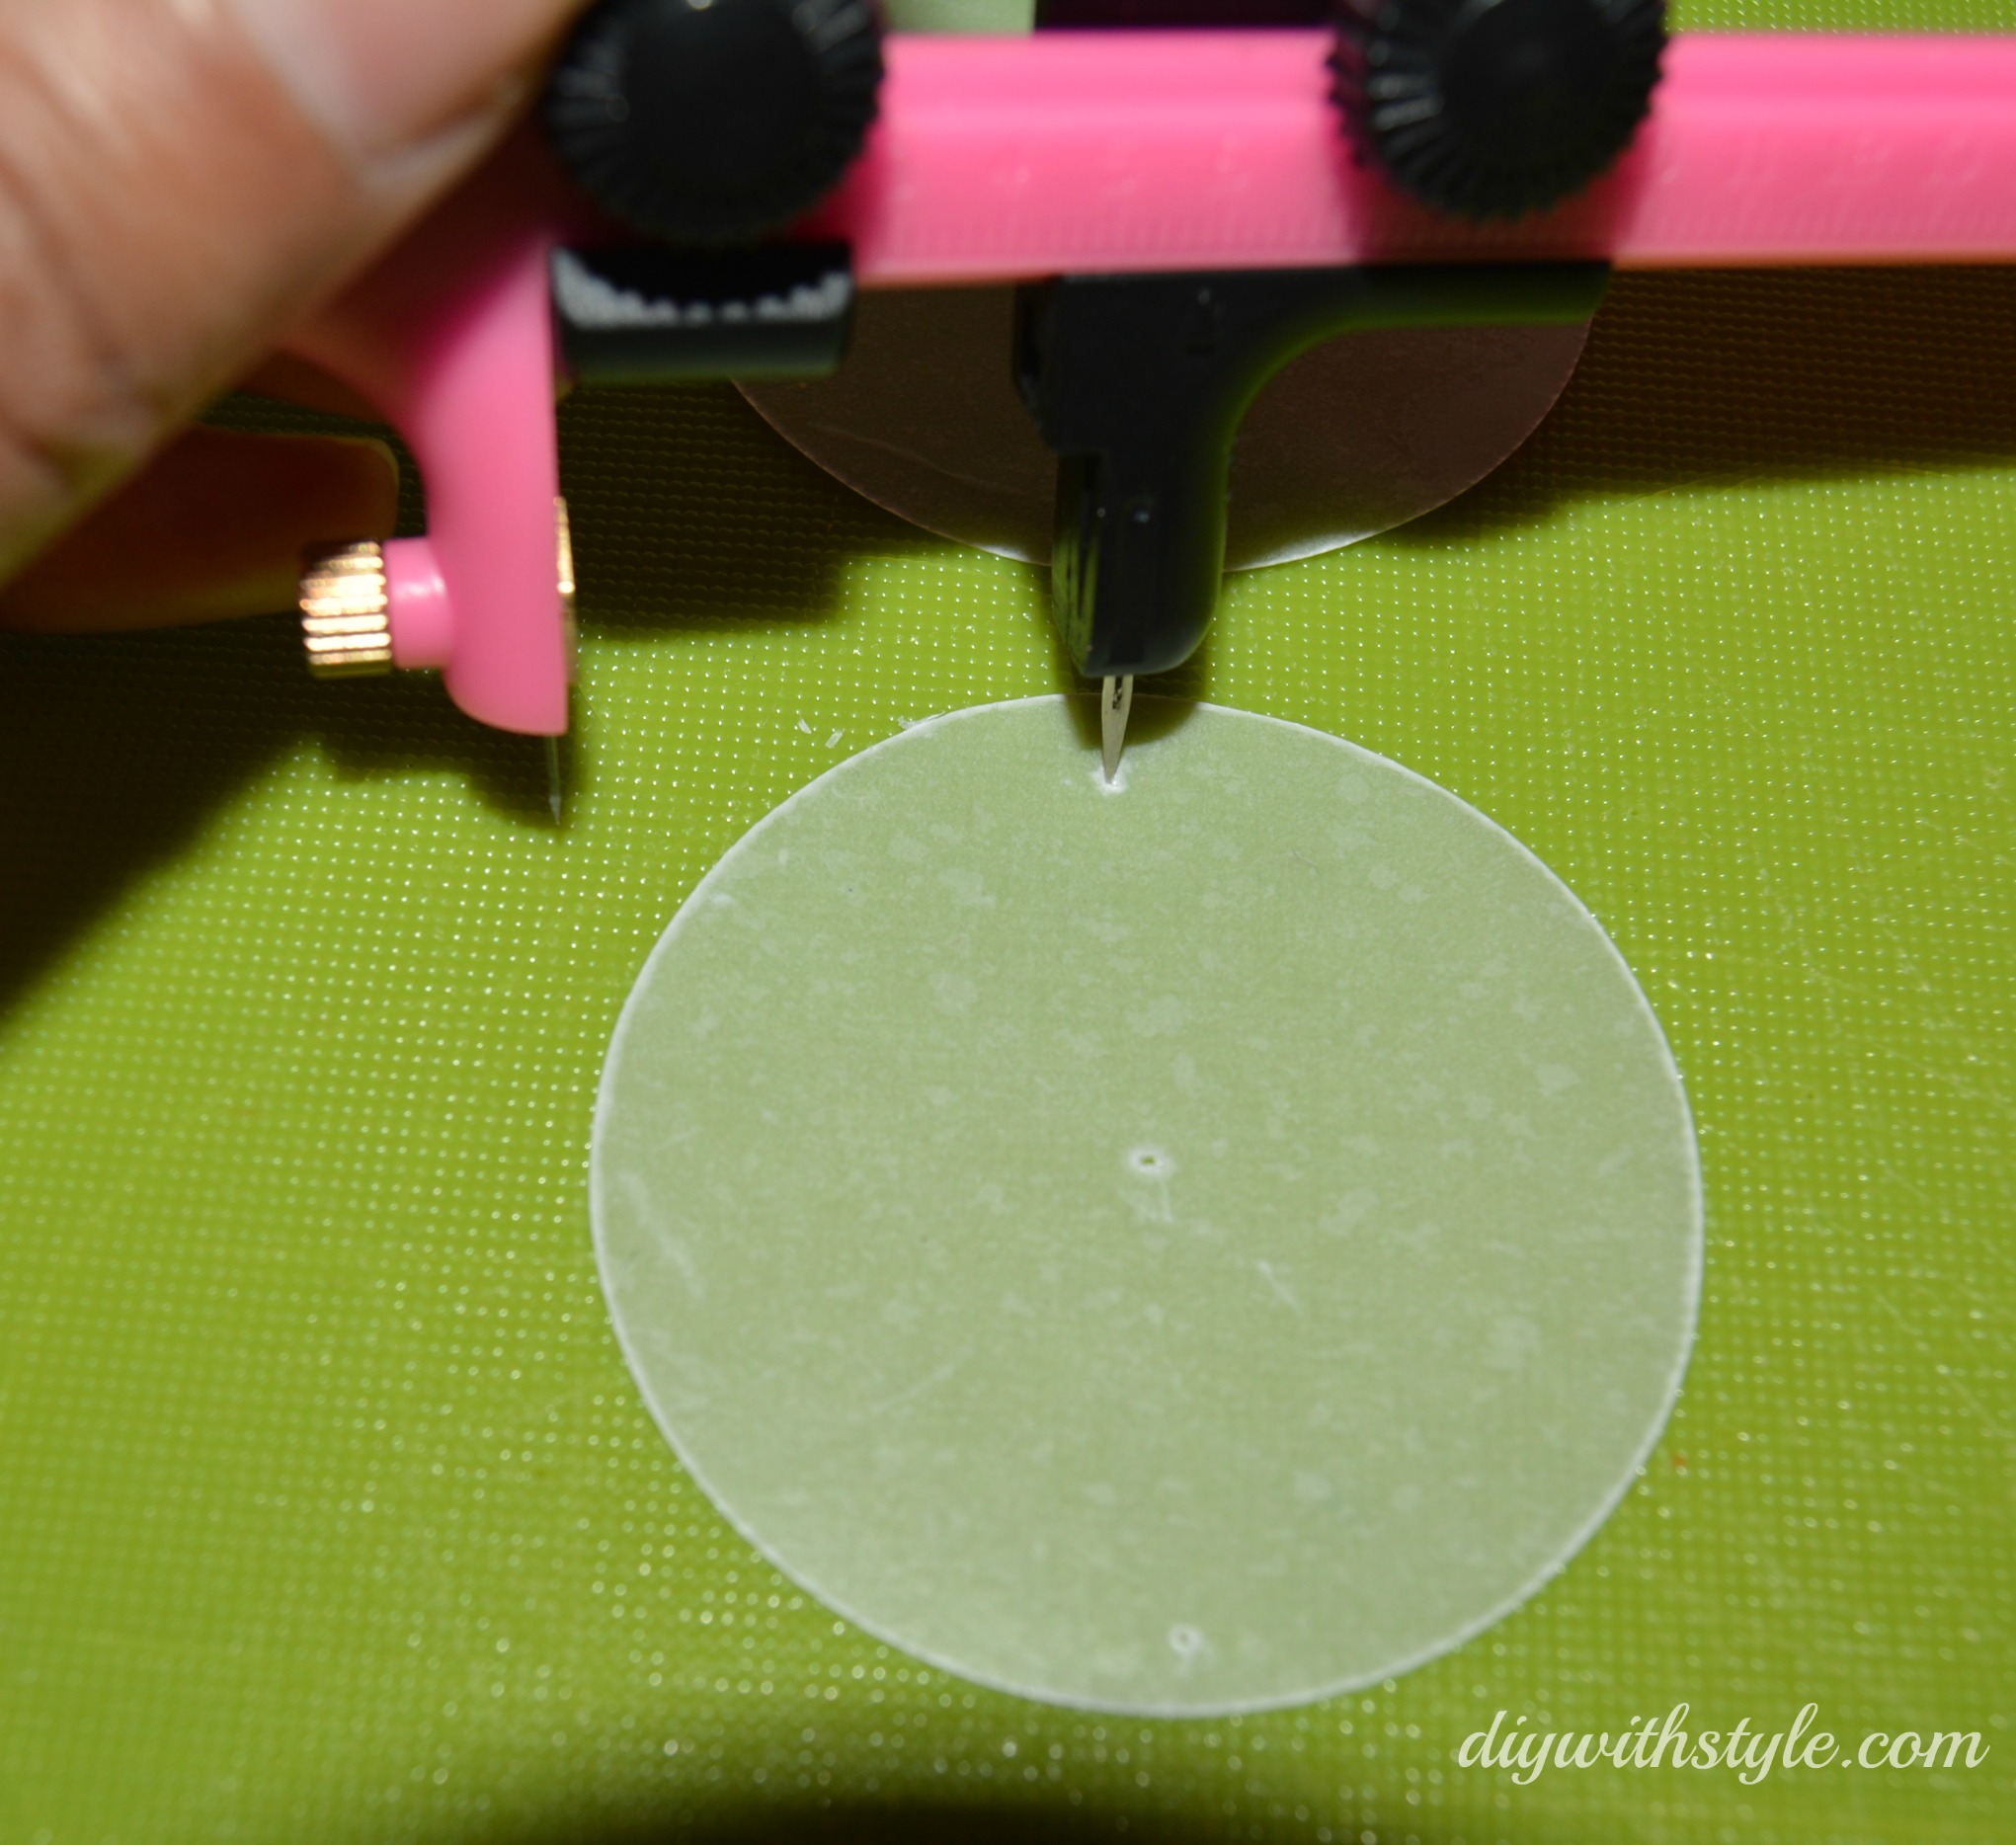
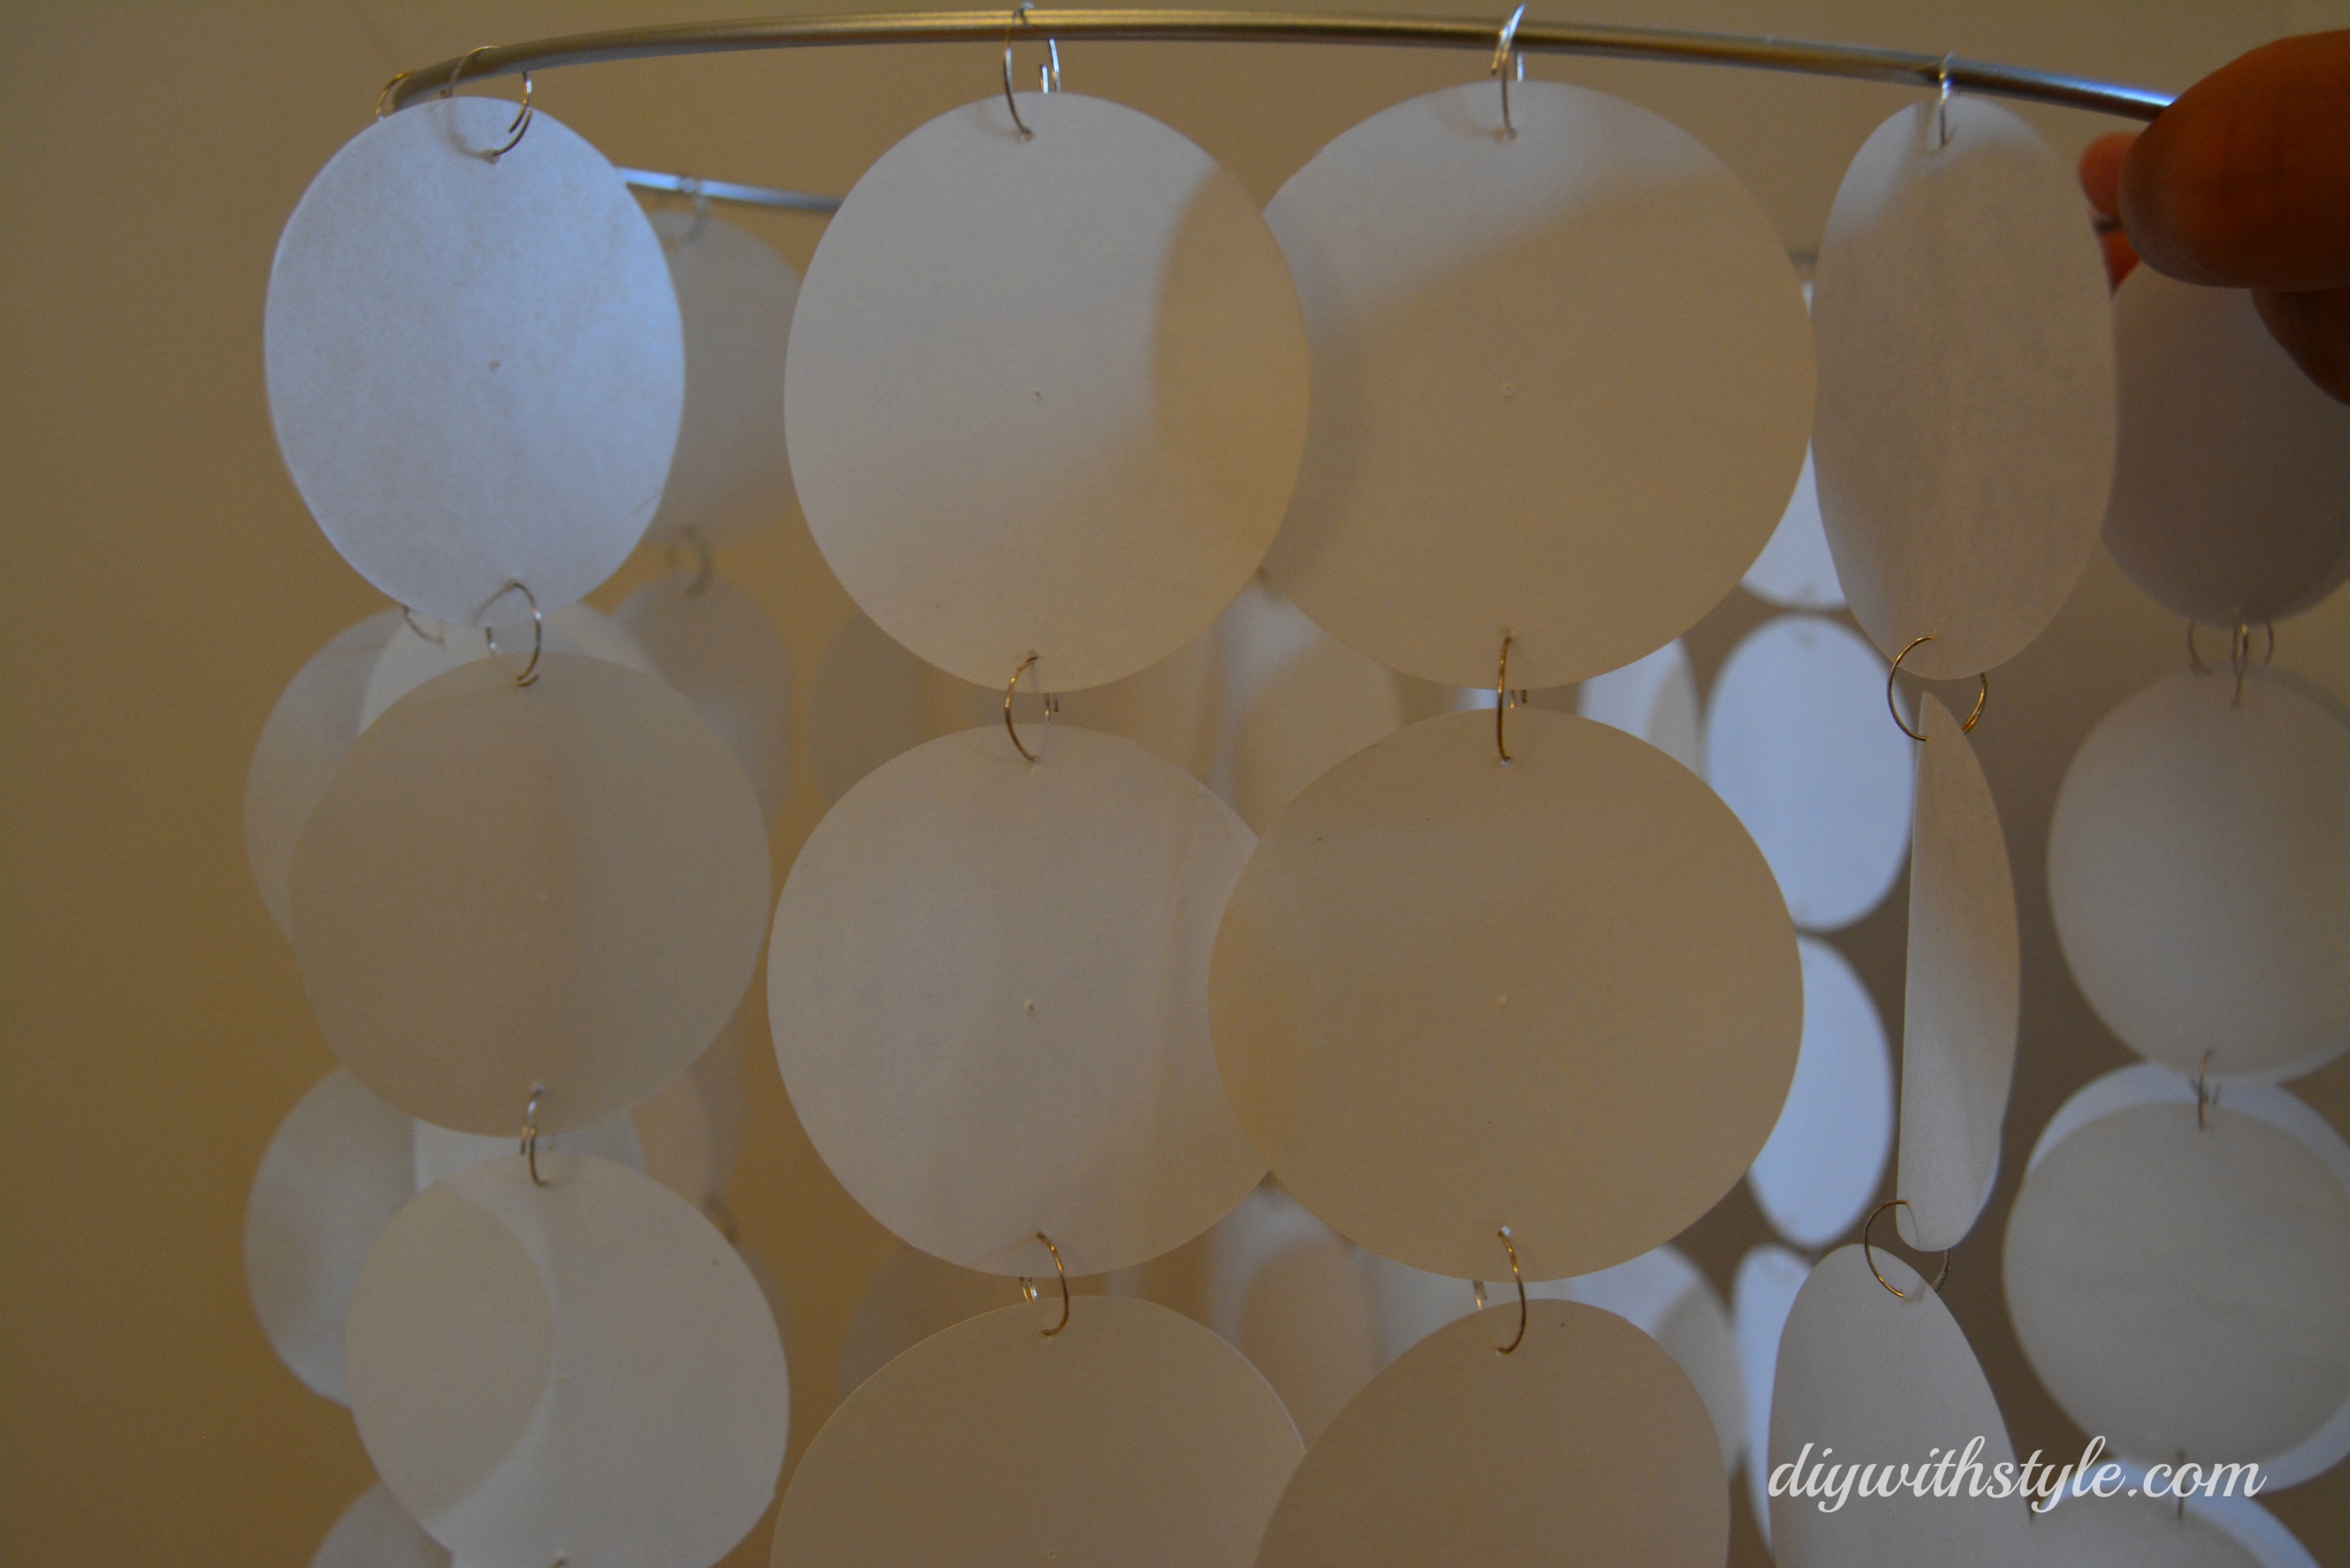
7. Start building your “capiz shell” chains: Using a pin, pierce each wax circle close to the top and bottom, about 4mm from the edge. Put the wire links through these small holes and connect the wax paper circles. The last wax paper circle of each chain only needs the pinhole at the top! (obviously…). Attach the “capiz shell” chains to the large metal (brass) rings using the wire links.
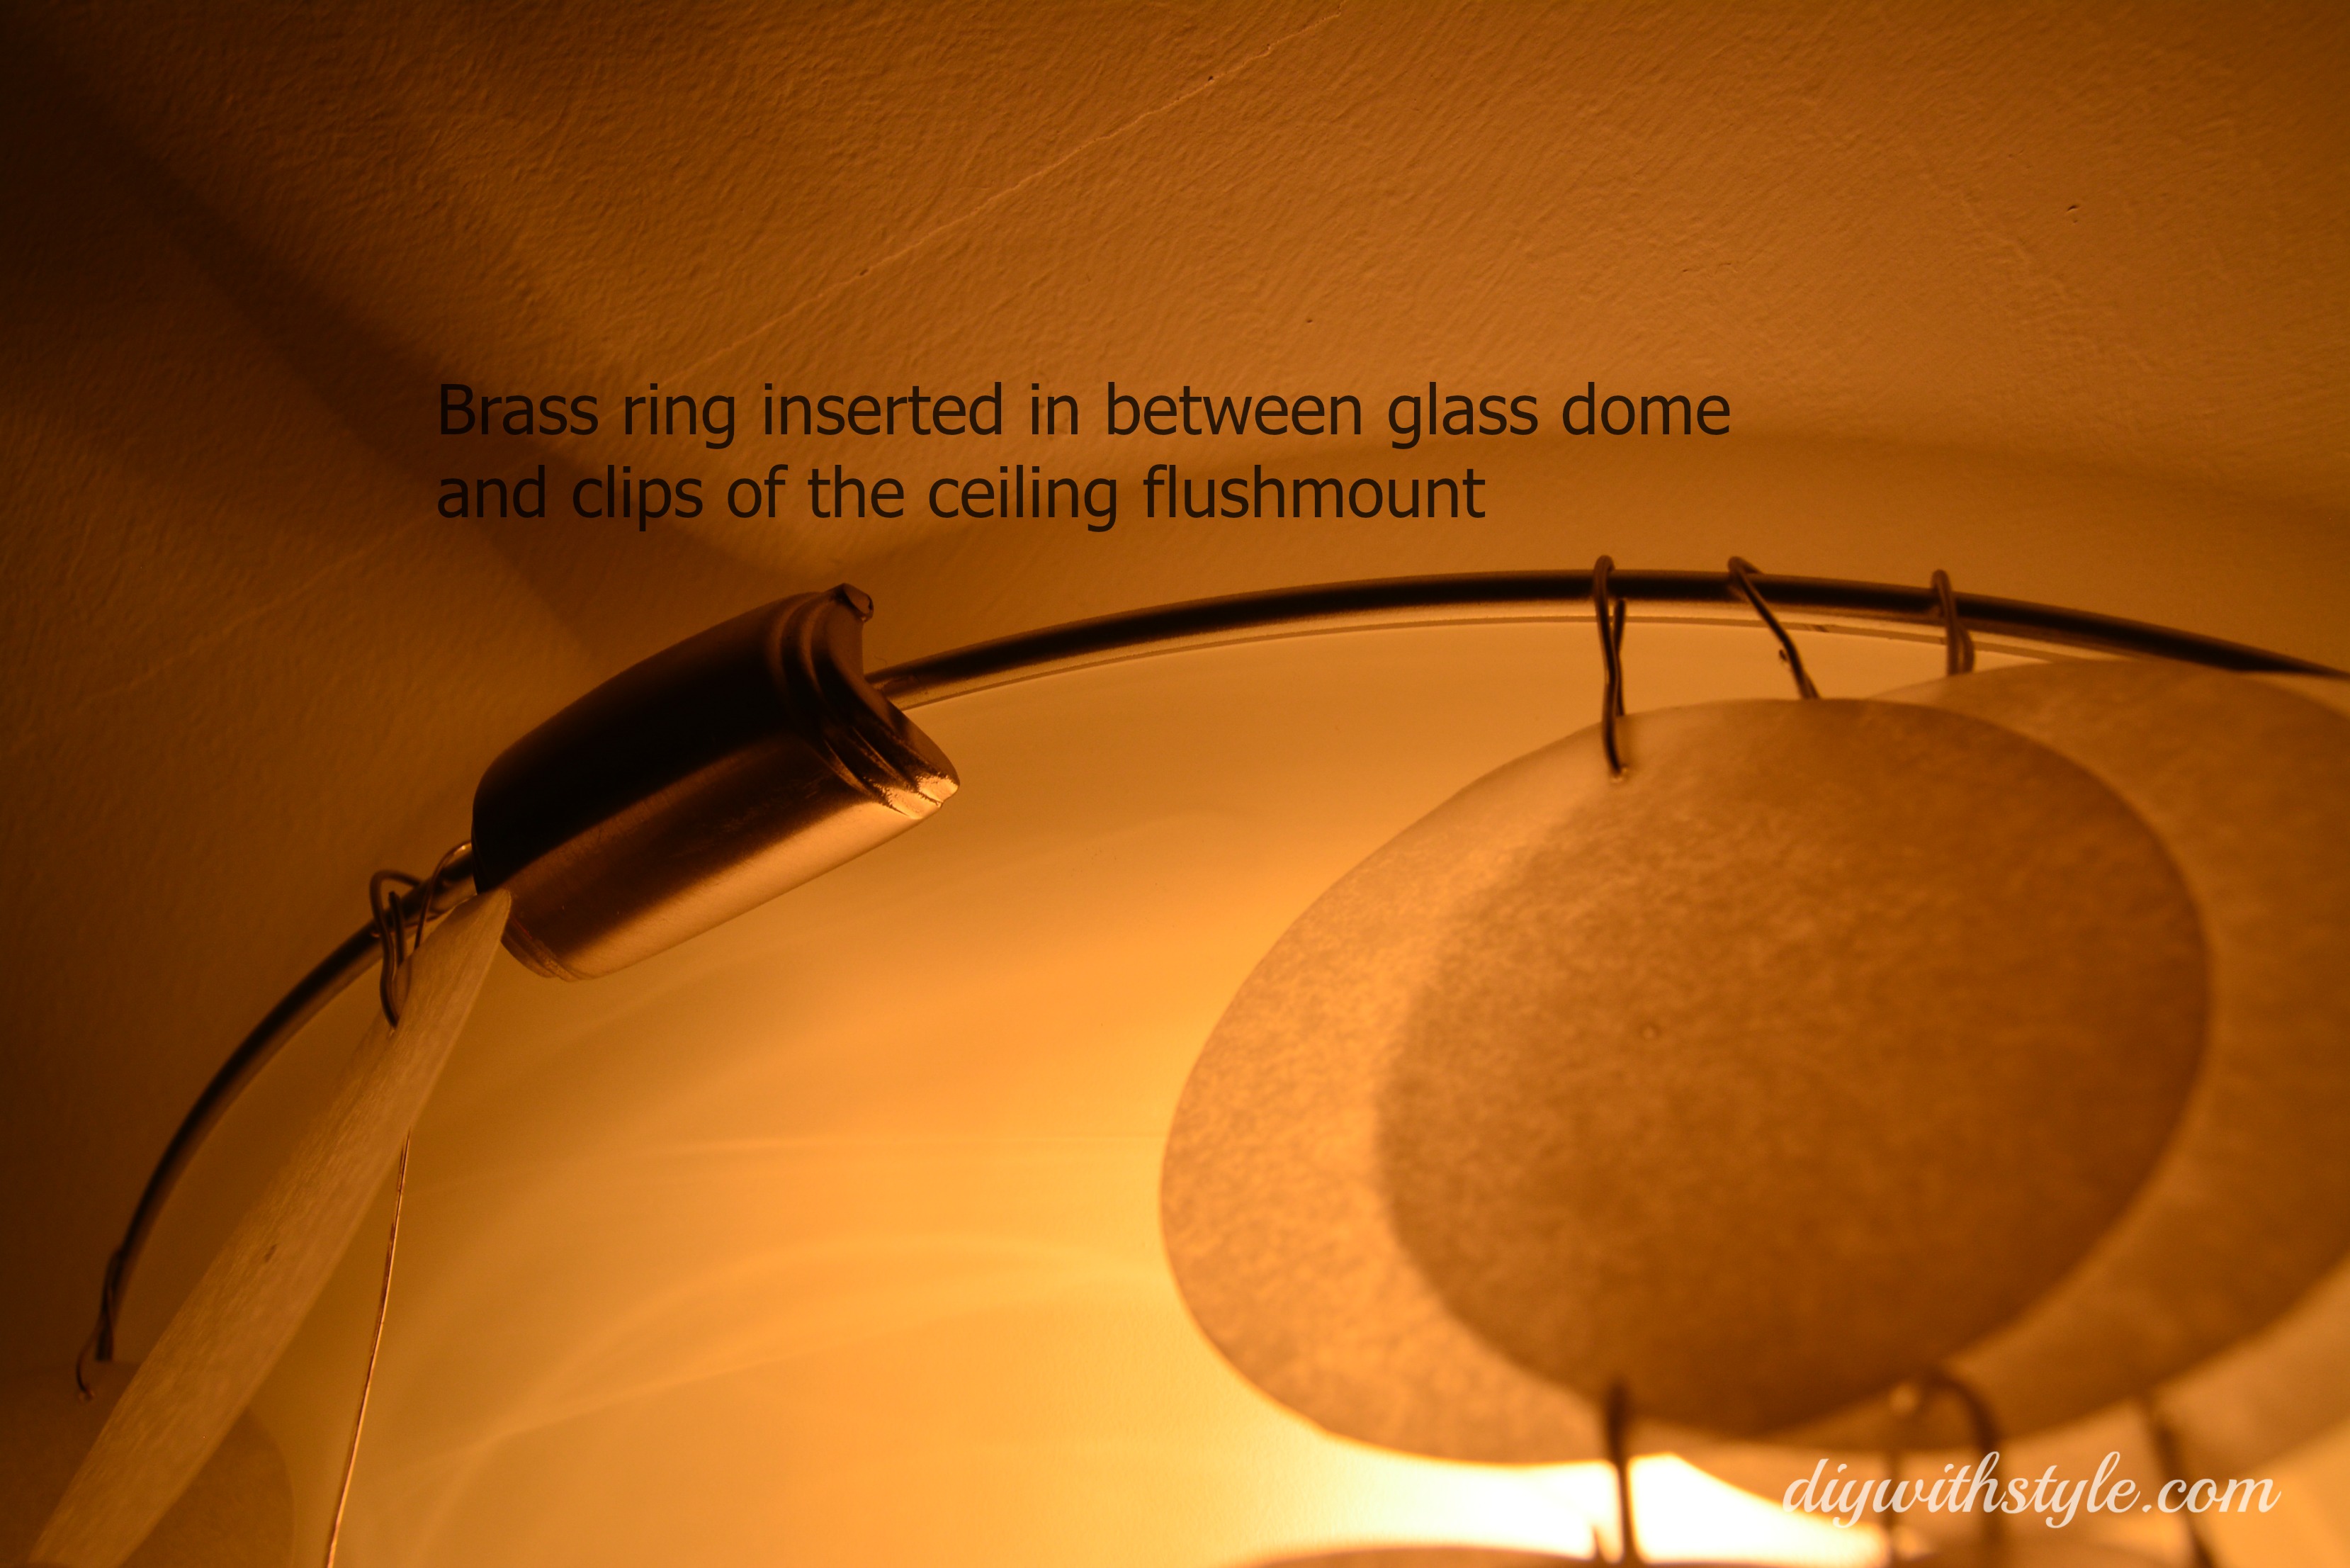
8. Install: Insert the larger brass ring in between the glass dome and the clips of the flush mount light.
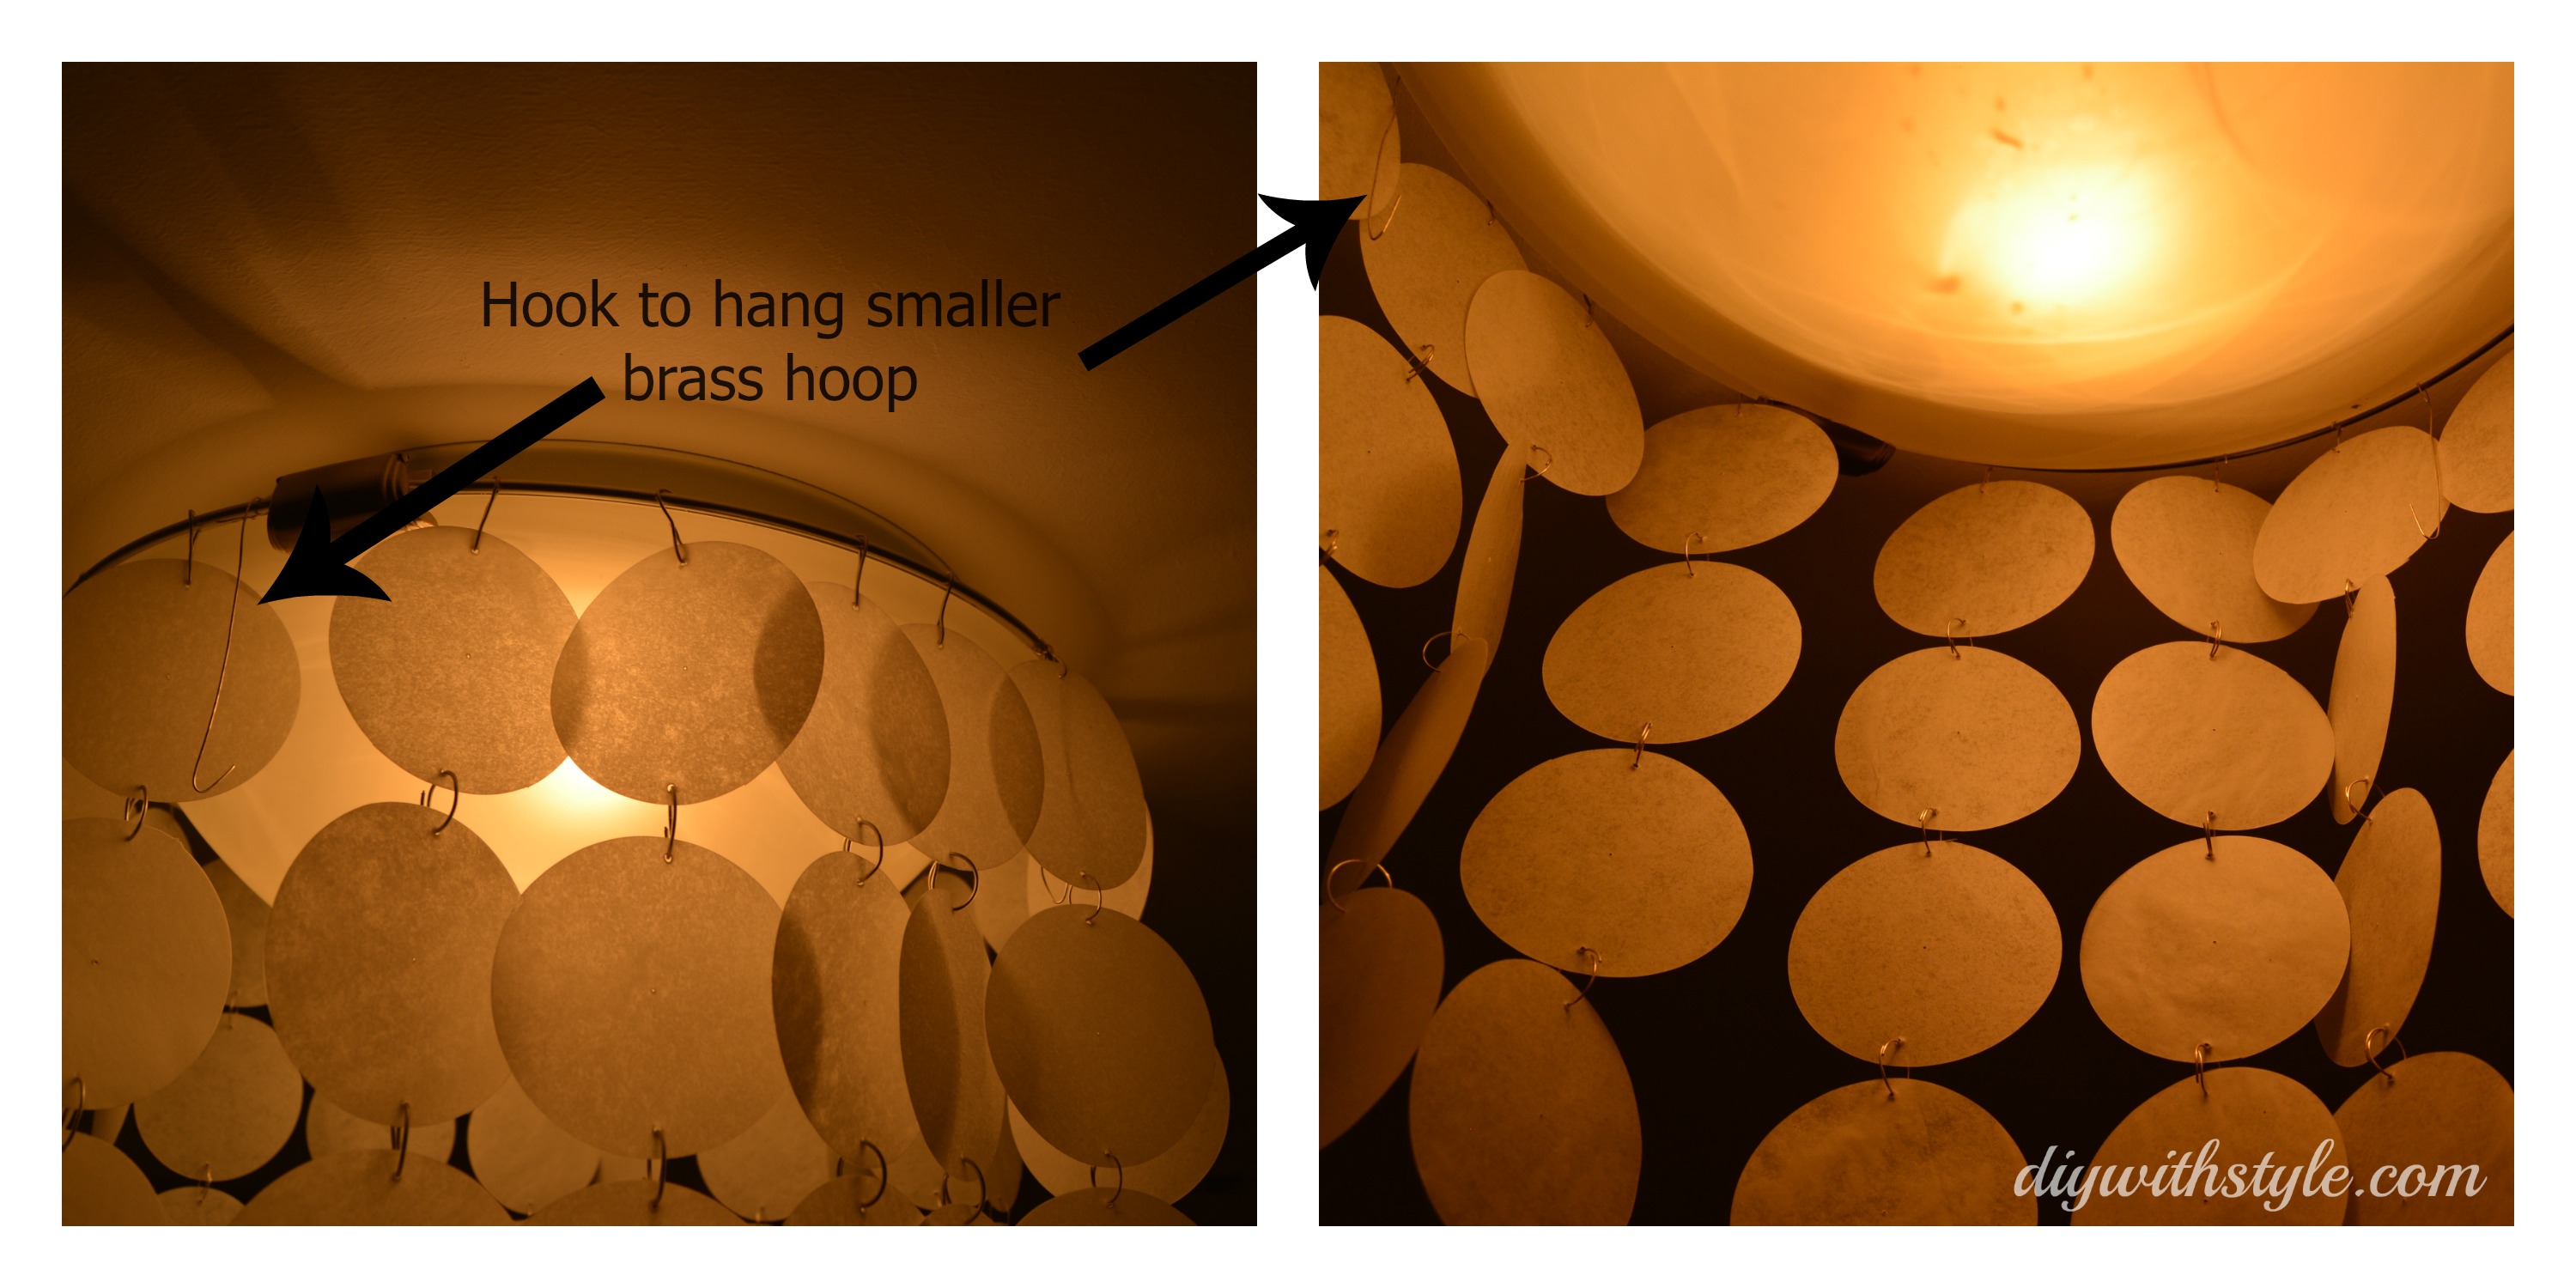
9. With some wire, make 3 hooks to hang the smaller brass ring with its “capiz shells” concentrically from the larger brass ring. The 3 hooks should be equidistant from each other. The length of these hooks will depend on how low you want to start the inner ring(s)
And yerrrr done! Here’s what the fixtures look like in my hallway, with different lighting.